
Mercedes 300GD 1983
This 300GD from 1983 has been depainted, derusted and coated at Carblast, Stuttgart. Chassis inlcuding the complete Powertrain has been impressivly restored at Fa Automobildesign Becker. Most of the rusted panels will be replaced by original Mercedes spare parts.
*** Clicking the picture or text will lead you to a photo collection ***
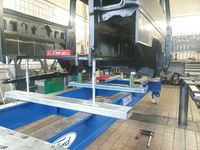
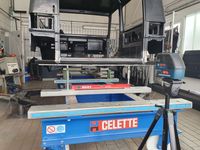
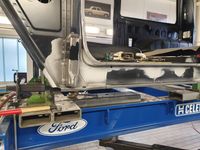
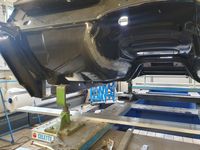
Installation on Celette System
The main body of this 300GD is joined to the chassis via 6 main installation points, which need to be well positioned and fixed to the Celette system before working on the main Structure. Via selfmade adapting tools, this works fine to allow proper structural repair.
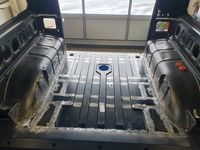
Installation of Rear Floor
The biggest original spare part is prepared for welding. Most of the joints are made by resistant spot welding, as in the original manufacturing plant. Before welding, of course fit and finish of the rear structure has been checked, and weld flanges are covered by INOX spray to be protected of corrosion.
Renewal Back Structure
The back strutcure is made from steel profiles with a gauge of 2mm. Left and right pillar needs a smart repair at the lower end. Final setting is realized with the help of a lazer spirit level.
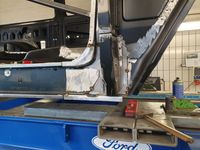
Repair of A Pillar Joint LHS
The heavily loaded A Pillar lower is completely stripped into pieces and new reinforcements are made by hand. Inner and outer rocker and outer surface parts are replaced by original spare parts. Before welding the hole area is assembled to check fit and finish of LHS door. Cavities and weld flanges are coated as usual.
Replacing front floor RHS
The front floor on the right hand side is replaced by an OEM spare part, which is positioned with the help of a manual fabricated Celette adapter. Joining in the area of the gear box tunnel is executed via seamless gas welding.
Repair of A pillar joint RHS
Same procedure as on the LHS. Most of the defect reinforcements are build new by hand. Before final welding everything ist checked for fit and finish.
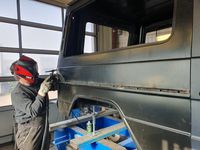
Build up Bodyside
Installing the outer surface panels follows an intelligent sequence to ensure most possible corrosion avoidance, mainly in the sensitive butt joint between body side outer and rear lamp can. Final joining happens after checking fit and finish of all outer surface parts including rear and side doors.
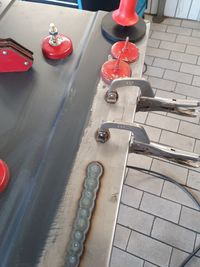
Repair of Rear Door
The rear door shows a typical corrosion damage in the very lower part. Outer surface and inner frame are affected. After separating the outer surface from the inner frame the repair is done by WIG welding, which avoids too much distortion of the 0,8mm outer panel. After repairing both parties, they nicely join after fit and finish check.